Tuesday, December 6, 2011
Busy Mama
Sorry, friends! I have neglected my blog for a while. With the kids, the packing, the in-laws visiting, Thanksgiving, Christmas around the corner, my niece due any day.... whoa, it's just been nuts around here! I have a few posts in the works, including the highlights on the move. Ten days to go...
Wednesday, November 23, 2011
Moving!
I referenced 'a major life decision' in a recent post, and this is it! We're moving! We might be the craziest people on the planet, with a toddler, a new baby, parents-in-law visiting, approaching the holidays - oh! - and my sister's baby due any day. (She has asked me to be there when the baby is born, and I am thrilled!)
In any case, a wonderful opportunity to live very near my sister and brother-in-law came up, and we just couldn't pass it up. So we are going to move to a wonderful neighborhood outside the city to a beautiful but modest home with a huge backyard. There are mature trees and grass... finally some nature for us!
We plan to be fully in the new house before Christmas. We shall see how we do with that deadline! Wish us luck
Monday, November 14, 2011
No Cost Toddler Playtime
On the heels of a major life decision that will make our frugal ways even more of a necessity, I realized we need some free yet fun toddler activities in our repertoire. (More on that 'major life decision' later....) So, what free toddler things can we do?
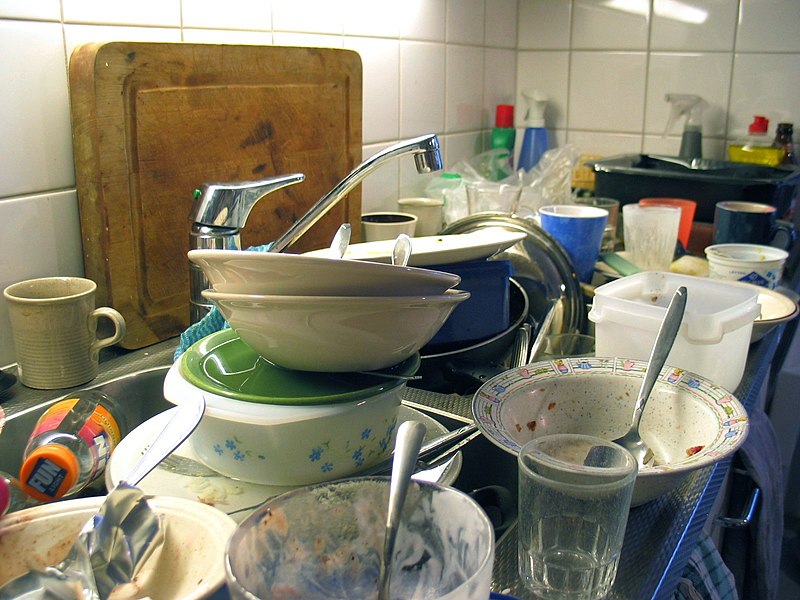
How about doing the dishes?
Okay, so the above photo isn't mine, and thankfully, that's not my sink or dishes! (Image Source)
This is what it really looked like today....
This afternoon, Luke 'helped' me do the dishes. What I thought would entertain him for a few minutes turned out to be a 45-minute play experience.


All I did was fill the sink with some water and the pre-rinsed dishes waiting to be washed, slide the chair over, and supervise. How easy! I was able to de-seed the pumpkin we had carved earlier in the day while Luke played happily. My floor was soaked by the end, but that's no hassle to clean.
Have you considered some play experiences like this for your toddler? They mimic real life, and your toddler gets to try real activities he will experience as he grows up. They are imaginative, fun, and free! Can't get much better than that!
How about sweeping, cooking, vacuuming, laundry.... If my 20-month-old son can help me with the chores, while having a really great time, I am all for it!
How about doing the dishes?
 |
Okay, so the above photo isn't mine, and thankfully, that's not my sink or dishes! (Image Source)
This is what it really looked like today....
 |
| Give me a break... I was in the process of cleaning! |


This boy was having so much fun that he refused to look at me as I was calling his name for a photo op!
Have you considered some play experiences like this for your toddler? They mimic real life, and your toddler gets to try real activities he will experience as he grows up. They are imaginative, fun, and free! Can't get much better than that!
So it got me thinking.... if Luke enjoyed doing the dishes so much, what other real-life games could we play?
Saturday, November 12, 2011
Fun and Frugal Snacks
In an effort to save some money on our grocery bills, I like to shop the bulk section of the grocery store. Whole Foods offers inexpensive organic versions of most bulk items, so I can save money while still offering my family nutritious organic options.
So what's my fun and frugal snack today? Roasted pumpkin seeds! Of course, now is the perfect time of year to get your pumpkin seeds the fun way, right out of your fall pumpkins. You already bought it, so why not get more out of it than just a cute seasonal decoration? Kids can help carve and separate the pulp from the seeds. Less work for you, and it gives the little ones something fun and messy (but not too messy) to do.

Yesterday, I roasted two batches of pumpkin seeds. I wanted to have a sweet snack and a savory snack, so I found two recipes and waited until Luke and Maggie were napping - sometimes, just sometimes, I have that sweet moment when both children nap at the same time!
Spicy Savory Pumpkin Seeds
Now, for the grand total.... For about 3 cups of organic pumpkin seeds at Whole Foods, I spent $2.39. I had all the spices, sugar, butter, and oil in my pantry already. I made two delicious and nutritious snacks with $2.39! Compare that to the pre-packaged spicy pumpkin seeds I found here. You could spend $2.99 for a 4-ounce bag (which equals 1/2 cup). That means that by buying in bulk and roasting the seeds yourself, you save over $15!


 |
| Beautiful array of bulk choices... looks so nice, you hardly think it can save you money! Image Source |
 |
| Everyone is a little dazed the first time they shop bulk! Image Source |
So what's my fun and frugal snack today? Roasted pumpkin seeds! Of course, now is the perfect time of year to get your pumpkin seeds the fun way, right out of your fall pumpkins. You already bought it, so why not get more out of it than just a cute seasonal decoration? Kids can help carve and separate the pulp from the seeds. Less work for you, and it gives the little ones something fun and messy (but not too messy) to do.

Yesterday, I roasted two batches of pumpkin seeds. I wanted to have a sweet snack and a savory snack, so I found two recipes and waited until Luke and Maggie were napping - sometimes, just sometimes, I have that sweet moment when both children nap at the same time!
Spicy Savory Pumpkin Seeds
- about 1.5 cups of pumpkin seeds
- 2 tbsp olive oil
- 1/2 tsp paprika (or smoked paprika)
- 1/4 tsp cayenne pepper
- a few shakes of red pepper flakes
 |
| Our spicy snack - yum! |
Cinnamon Sweet Pumpkin Seeds
- about 1.5 cups of pumpkin seeds
- 2 tbsp melted butter
- 1 tsp cinnamon
- 2 tbsp sugar (I use turbinado sugar, but be careful, as it caramelizes quickly)
 |
| Our sweet snack - already down to the bottom of the jar! We demolished these in just a day! |
I put foil on two baking sheets, set oven to 325 degrees, then roasted seeds in a single layer for about 25 minutes. I stirred every 7-8 minutes or so. The house smelled awesome after I roasted these! My husband came home, sniffed, and wondered what I had been making all day - ha!
Now, for the grand total.... For about 3 cups of organic pumpkin seeds at Whole Foods, I spent $2.39. I had all the spices, sugar, butter, and oil in my pantry already. I made two delicious and nutritious snacks with $2.39! Compare that to the pre-packaged spicy pumpkin seeds I found here. You could spend $2.99 for a 4-ounce bag (which equals 1/2 cup). That means that by buying in bulk and roasting the seeds yourself, you save over $15!
I linked this post Traditional Tuesdays at Whole New Mom and Show Me What Ya Got at Not JUST a Housewife. Check them out!
Friday, November 11, 2011
Homemade Baby Wipes
What kind of baby wipes do I use?
...not Huggies or Pampers. Not knock-off brands either. I use cloth. Yep, cloth!
 Why cloth wipes?
Initially, we chose cloth diapering for both of the 'eco' reasons - economical and ecological. I will post more on my love of cloth diapers at some point, but for now, I want to share my experience about our cloth wipes and why I love them so!
Yes, using cloth leaves less of a footprint on our planet, and yes, it saves us oodles of money. And while those are good enough reasons to use cloth wipes, there is another reason cloth is so appealing to us. Unfortunately, disposable wipes are often made with chemicals that I would rather not apply to my baby's skin, especially in such sensitive areas. So for us, using cloth made a lot of sense for many reasons.
My background with cloth wipes...
When I entered the cloth diapering world during my pregnancy with Luke, I bought two packs of Bum Genius cloth wipes (12 in a pack, for about $12). I also splurged on a Prince Lionheart wipes warmer for about $25. I bought the 'warmies' version which is specifically designed for warming cloth wipes. I Googled ideas for ingredients for the wipes solution, and found I had many of the items already. Since Maggie has come along and I need more wipes on hand, I decided to cut up an old receiving blanket to add to our stash of wipes. (By this time, I was too frugal to pay $1 each for the name-brand cloth wipes!)
This is how I do it...
With two little ones, easy is the name of the game! I whip up a batch of wipe solution about twice a week. My recipe for wipes solution is as follows:

 I roll my wipes before I begin (as pictured) so they will fit in the warmer. Then I dip them in the bowl, wring them out, and place them in the warmer. After I fill the warmer, I fill three spray bottles with the leftover solution. One bottle stays upstairs for nighttime diaper changes, the other stays at the changing station downstairs right next to the warmer, and the final smaller bottle goes right into our diaper bag. I reserve a pile of wipes to keep dry, some which go into the diaper bag, while the others hang out near the warmer. Inevitably, I will run out of warm wipes and will use the spray bottle to wet the dry wipes on an as-needed basis. The whole thing is super easy and takes all of 5 minutes to do! (Just think.... no more emergency trips to Rite Aid because you are out of wipes! Saves time too!)

And the grand total is....
$24: One time cost of wipes
$25: One time cost of warmer
$1: Bottle of witch hazel (need about two per year)
$5: Bottle of tea tree oil (still on first bottle after 18 months)
$5: Bottle of lavender oil (working on second bottle after 18 months)
$5: Bottle of calendula oil (still using first bottle)
$4: Bottle of Vitamin E oil (still on our first bottle)
$68 for our first year of using cloth wipes!
Yearly investment to continue use of cloth wipes: less than $20 per year!
Go frugal mamas, go!
Since you are here, and you have read to the end of my post, please consider becoming a follower. This is my new blogging venture, and I sure would appreciate some regular readers. I'd be happy to follow you, too!
I linked this post to Not JUST a Housewife and While He Was Napping.
...not Huggies or Pampers. Not knock-off brands either. I use cloth. Yep, cloth!
 Why cloth wipes?
 Initially, we chose cloth diapering for both of the 'eco' reasons - economical and ecological. I will post more on my love of cloth diapers at some point, but for now, I want to share my experience about our cloth wipes and why I love them so!
Yes, using cloth leaves less of a footprint on our planet, and yes, it saves us oodles of money. And while those are good enough reasons to use cloth wipes, there is another reason cloth is so appealing to us. Unfortunately, disposable wipes are often made with chemicals that I would rather not apply to my baby's skin, especially in such sensitive areas. So for us, using cloth made a lot of sense for many reasons.
My background with cloth wipes...
When I entered the cloth diapering world during my pregnancy with Luke, I bought two packs of Bum Genius cloth wipes (12 in a pack, for about $12). I also splurged on a Prince Lionheart wipes warmer for about $25. I bought the 'warmies' version which is specifically designed for warming cloth wipes. I Googled ideas for ingredients for the wipes solution, and found I had many of the items already. Since Maggie has come along and I need more wipes on hand, I decided to cut up an old receiving blanket to add to our stash of wipes. (By this time, I was too frugal to pay $1 each for the name-brand cloth wipes!)
This is how I do it...
With two little ones, easy is the name of the game! I whip up a batch of wipe solution about twice a week. My recipe for wipes solution is as follows:

- 1 tbsp witch hazel
- 1-2 drops Vitamin E oil
- 1-2 drops tea tree oil
- 1-2 drops lavender oil
- 1-2 drops calendula oil
- a big bowl-full of hot water
Of course, this is approximate and I don't measure out my witch hazel, nor do I get upset if I add a drop or two more than I intend. I am often doing this with a baby in my arms and make mistakes!
 I roll my wipes before I begin (as pictured) so they will fit in the warmer. Then I dip them in the bowl, wring them out, and place them in the warmer. After I fill the warmer, I fill three spray bottles with the leftover solution. One bottle stays upstairs for nighttime diaper changes, the other stays at the changing station downstairs right next to the warmer, and the final smaller bottle goes right into our diaper bag. I reserve a pile of wipes to keep dry, some which go into the diaper bag, while the others hang out near the warmer. Inevitably, I will run out of warm wipes and will use the spray bottle to wet the dry wipes on an as-needed basis. The whole thing is super easy and takes all of 5 minutes to do! (Just think.... no more emergency trips to Rite Aid because you are out of wipes! Saves time too!)
So I usually have my warmer filled, and the dry wipes are there if I need them. It makes diaper changes a cinch.

Let's compare...
It is estimated that you will use between 6000 and 8000 wipes on your baby in his first year. At $.03 per wipe, you will pay between $180 and $240 for disposable wipes each year! Even when you factor in the cost of washing the wipes (I make my own laundry detergent to help save moolah there too), you are still saving a significant amount of money by using cloth wipes.And the grand total is....
$24: One time cost of wipes
$25: One time cost of warmer
$1: Bottle of witch hazel (need about two per year)
$5: Bottle of tea tree oil (still on first bottle after 18 months)
$5: Bottle of lavender oil (working on second bottle after 18 months)
$5: Bottle of calendula oil (still using first bottle)
$4: Bottle of Vitamin E oil (still on our first bottle)
$68 for our first year of using cloth wipes!
Yearly investment to continue use of cloth wipes: less than $20 per year!
Go frugal mamas, go!
Since you are here, and you have read to the end of my post, please consider becoming a follower. This is my new blogging venture, and I sure would appreciate some regular readers. I'd be happy to follow you, too!
I linked this post to Not JUST a Housewife and While He Was Napping.
Monday, November 7, 2011
Cheap Nursery Art
Check this out! After spending a ridiculous amount of money on my son's professionally-painted and hand-crafted nursery name art, I decided my daughter should have an equally-beautiful version at a fraction of the price. I came up with an idea while shopping at Ikea one day. (Favorite store, by the way!) So here's the finished product. Not bad, huh?
What I used:
A 3-pack of plain wood frames is $1.99 at Ikea. I bought two packs. I Googled the different letters I wanted, searched images, and chose the best black and white versions of the letters for Maggie's name. They look funky and awesome, and were free! Can't beat that! I already had the red ribbon, craft glue, panel board nails, and white acrylic paint lurking in my craft box. For the sake of coming up with the total cost, I listed the cost of the ribbon and paint, since I remember how much they cost when I purchased them. (When I buy things for a bargain, I tend to remember!)
So here's my list of items for this project....


 |
| Maggie's wall art hanging above her crib |
What I used:
A 3-pack of plain wood frames is $1.99 at Ikea. I bought two packs. I Googled the different letters I wanted, searched images, and chose the best black and white versions of the letters for Maggie's name. They look funky and awesome, and were free! Can't beat that! I already had the red ribbon, craft glue, panel board nails, and white acrylic paint lurking in my craft box. For the sake of coming up with the total cost, I listed the cost of the ribbon and paint, since I remember how much they cost when I purchased them. (When I buy things for a bargain, I tend to remember!)
So here's my list of items for this project....
- 6 plain wood frames from Ikea ($3.98)
- white acrylic paint (already in my craft box, but cost $1 a few months ago)
- craft glue (lurking in my craft box)
- red ribbon ($1 in clearance bin at fabric store)
- two panel board nails (found in husband's toolbox)
- black and white fancy letters (free!)
Final cost: $5.98! Not too shabby!
Here are some close-ups of the finished project...
 |
| Note the different funky letters - I wanted all of them to be black & white, but different fonts. I used landscape and portrait orientations by accident based on which letters fit in the frames. |
 |
| I hung bows at the top and bottom of the long ribbon. |
 |
| I glued the frames onto the ribbon first, then hung the ribbon from the panel board nails. |
 |
| I painted one coat of white and sanded to create a distressed look. |

Since you are here, and it's pretty obvious I am just starting this blog, help me out and follow me! If you leave me a comment with your blog address, I'd be happy to follow you too. Thanks in advance!
I linked this project to the following great blogs:
Tuesday, November 1, 2011
Welcome!
I am Nancy, a stay-at-home mom to two young children. Since leaving my job as a teacher to stay home and raise our little ones, saving money in creative ways has become a mission and a lifestyle. I am the first to admit that pinching pennies used to feel limiting, but I have come to thoroughly enjoy our frugal ways. I view stretching our dollars as an integral part of my job as a wife, mother, and homemaker (and I am not at all bothered by the somewhat antiquated term homemaker, in case you were wondering)!
I hope that this blog can help other families learn how to make it work on one salary. I also hope it helps others see that saving money can be empowering and fun.
Stay tuned and check back often for money-saving tips that have worked for our little family.
I hope that this blog can help other families learn how to make it work on one salary. I also hope it helps others see that saving money can be empowering and fun.
Stay tuned and check back often for money-saving tips that have worked for our little family.
Subscribe to:
Posts (Atom)